Components are blocks of html and Vue coding that are contained in one unit. At first glance components may seem intimidating but they are actually one of the easier aspects of Vue to use and grasp. The Vuemastery.com tutorial for components compares them to Lego blocks and that analogy seems to be pretty accurate. The overall Vue project you end up with may be huge, but it's a lot easier to understand and debug when it is made of lots of easily managed components. So let's dive in and learn how to use them.
- To begin, download this file (toast.zip) and drag its contents (component.html and component.js) into your work folder.
- Open both files side by side in your editor and take a look. Both files are very basic.
- The html file displays one variable, toastState, and also has a button that calls a function named checkToast.
- The js file has a vue named co, which references the #co div tag.
- It also defines the same toastState variable and contains the checkToast function which changes toastState from burned to perfect. That's it!
- Now our job is to create a really basic component out of these equally basic materials. BTW, it would be possible to create a component from scratch but it seems easier and more logical to produce a functional Vue instance and convert it to a component after everything is working properly.
- Let's begin by creating our component above the co vue object.
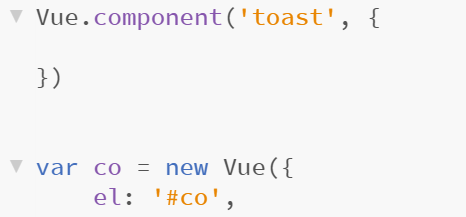 As you can see, the component is set up differently from a Vue object. The name is in quotes, followed by a comma and curly bracket. As in the Vue object, all of the work takes place within those brackets {}.
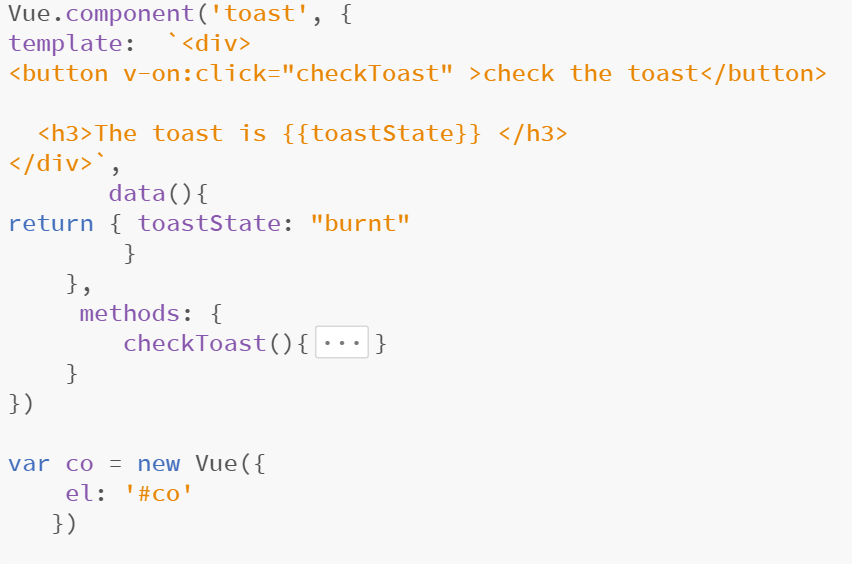
 - Time to add our html to the component. Select and cut, not copy, everything inside of the #co div tags, starting with <button and ending with </h3> and add it to your component as shown below. As you can see, the component now has a template (that's your html). the contents of the template are contained within "tic" marks (indicated by arrows) from the far upper left portion of your keyboard.

- Templates are peculiar and picky creatures and require everything to be inside of those tic marks. Furthermore (, if there is more than one element in the component, all of those elements must be enclosed in a parent element such as a div tag. So add <div> just after the first tic mark and </div> just before the last tic mark. Your template will treat you very badly until you do this.
- Now remove the data and methods from the original Vue and add them to the component. The finished product is below. As you can see, the data must be modified with parentheses, an additional set of brackets and a return statement before it works properly. The methods do not have to be altered at all. Take note as well, that the Vue instance has an element and nothing else. Everything else that was in the Vue instance, now is in the component.
- Let's begin by creating our component above the co vue object.
- The final step is to add the toast component to our html file.

Props!
Now you have an actual component, which in one respect is even better than those Lego blocks we used as a metaphor: unlike physical Legos, components can be used more than once in the same project (ie. html document). Paste <toast></toast> into your html document a few times, and check it out.
The fact that components can be used multiple times, leads into an aspect of components referred to as 'props.' Props function a lot like arguments in functions, in that they make it possible to pass distinct values for each instance of a given component.
- Time for a prop demonstration. As you can see below, we have added props to our component and have declared a new 'string prop' named toastopinion and have added it to our template (indicated by the second red arrow). You may have also noticed that I did not use camel case for the prop name. That is because you can't use camel case if you want your prop to work! Dashes within your prop name don't work either, so use neither (excuse the poetry).

- Props are called when you declare the component in the html file as shown below and you can create and use as many as you want to in your template. Test it out.

- Props can even be used to modify the style of a given component. Try it, by following the example of the two screen captures below.


Take the challenge(s)
Challenge 1: Now that you have a reasonable understanding of how components function, it's time to put that knowledge to work. Reopen the very first Vue project that we did in this class. You remember, the one that used the prologue template from html5up.net. Create a new component by combining the data, methods, etc. of the portfolio Vue (as in var portfolio = new Vue({ ) with the html within the #portfolio div tag. You may find it easier to move all of the portfolio stuff into a new js file.
Challenge 2: Find at least one classmate to work with you on this project. Each of you will take on the task of doing just what you did in Challenge 1 with one of the other Vues and the associated html. Then you will combine each other's work into one big project. For example, one of you can work with the header Vue and everything inside of the #header div. Your partner can tackle the about Vue or one of the others. Then you may use Slack or some other means to get both components on the same computer and put it all together. The idea here is to at least try to mimic the experience of team-based Vue development.
Challenge 3: Download this zip file which contains a clean, functional version of an earlier project in which we displayed information about YOU. Basically, do the same thing you did in the last challenge. This Vue is much bigger, but it's still basically the same process and not that difficult to do. Took me about 5 minutes.