Node.js is the cornerstone of an extensive, complicated, and increasingly popular web development ecosystem. Put very simply, the Node system manages the data (AKA back-end) that forms the actual content of many popular websites. Some Node-based sites look the same for all users. In other cases, tailored content appears based on the user's identity or a search term (think Airbnb).
At this point (March 31, 2021) in my personal Node journey, I have worked through LOTS of tutorials, all of which led me to wonder "How am I going to teach this complicated stuff?" I am still asking myself that question, but as the saying goes, "you have to start somewhere."
So, let's start. This lesson, produced by a fast talking person named Kyle, takes a hybrid approach and pairs his fast paced, but excellent, introductory lesson (video-based), with a lot of supportive material provided from me, including a lot code that you can copy and paste. One of the things that really slowed me down when I took the tutorial was trying to read his code off of the screen and transcribe it. You are welcome to copy any and all of the code that I provide, but please do pay close attention to everything that Kyle says. The name of the lesson is Build A REST API With Node.js, Express, & MongoDB - Quick. Everything about the title is accurate except the Quick part! The video lasts just 30 minutes, but he somehow manages to pack about a month's worth of information into that 1/2 hour.
Set the Stage
In addition to installing Node, you will need to install some supportive systems referred to as 'dependencies' that add special powers to your Node project.
-
- Follow this link to install Node.
- Visual Studio will be our editor. If you don't already have VS, follow this link to install it.
- Create a folder for your project named node1 inside of your 5110 folder that should also be in Dropbox.
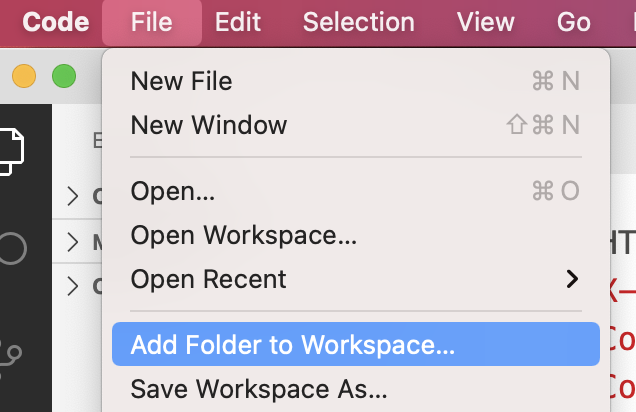
- Open VSCode and add the folder to your workspace or simply "open folder".
 VSCode includes a terminal that you will use extensively with this tutorial. With VSCode open, select View Terminal to make it appear.
- `This next part may be tricky if you have never done it before. You will need to open the node1 folder with terminal. If you are lucky, you will already be inside of your new node1 folder. If so, you can skip the next steps. If you are NOT in the node1 folder, Here is how to get there.
- If you are using a Mac, from the terminal window, type cd /Users (don't forget the space between cd and /users) and press return. This will put you inside of the Users folder of your Macintosh OS.
- Enter ls and press return. You should see your user name somewhere in there. As you can see below, my username is emuela

- Now enter cd your user name (in my case cd emuela) and press return. Now type ls and enter return once more. This time you should see your Dropbox, Documents, Desktop, Applications folder, etc.
- Now cd Dropbox and list the contents there. If you see your 5110 folder cd into it, and then cd into the node1 folder.(Start the video)
- At this point you are ready to start the video but I have provided a LOT of documentation to help with the more challenging parts of the video. Many times I will also reference the time point of the video that I am referring to.For example, 20 seconds into the video Kyle asks you to enter NPM init from the terminal window..

Do so and respond to all of the prompts by simply hitting the enter key until you are done. In case you are wondering, NPM stands for Node Package Manager. - As a result of the NPM init process, you now have a new file named package
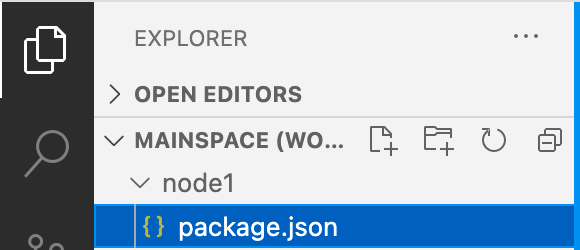 .json that ultimately will tell your project which dependencies (external scripts) to use. You should see this file in your VSCode sidebar. Click on package.json to open it and make it available for editing.
 - In the next couple of steps the narrator leads you through the process of installing 'dependencies' which are add-on programs that work in conjunction with node.js to perform specific tasks.
- the first 2 dependencies are Express and Mongoose. Express makes web app development much easier with short and easy to follow syntax; Mongoose is the database for this particular web app. To install them enter
- npm i express mongoose into your terminal and press enter.
- Next, install dotenv and nodemon simultaneously by entering
npm i --save-dev dotenv nodemon .
dotenv is used for saving variables that you don't want other people to be able to access.
Nodemon restarts the app every time you make a change. Otherwise, you have to manually restart the app to see the effect of each change that you make, and that can take up a LOT of time. This is especially useful when there is an error in your code because you get immediate (negative) feedback and have to fix each error before you can progress further. - Now that you have installed a bunch of dependencies, take a look at your files via VSCode. You should see a new node_modules folder that is loaded down with all of those new things that you installed.
- Open package.json and figure out where the four dependencies are referenced. As you can see, during the installation process package.json automatically updated as well.
- Finally, if you are following along with the video, notice that we are just one minute and 20 seconds into a 29 minute video! This guy is truly a fast talker!
- the first 2 dependencies are Express and Mongoose. Express makes web app development much easier with short and easy to follow syntax; Mongoose is the database for this particular web app. To install them enter
- In the nest step, replace the text on line 7 that begins with "test" with "devStart": "nodemon server.js". This creates a script that can be used to activate a file named server.js that will serve as the starting point for your server. You are doing this so that nodemon, one of the dependencies that you just installed is used to start the script. Once nodemon is on the job, every time you make a change and save a file, the server will automatically restart.
-
Create and Set up Initial Files
(about 1:30 into video)- Now create a .env file that can be used to keep variables out of public view and another .gitignore where you will reference folders and files that will not be transferred to git later on (don't worry too much about this one for now).
- Next create a file named server.js that ultimately will server as the starting file for this project and for activating your server. On the first two lines add:
const express = require('express');
const app = express()
The first line as you can see 'requires' express to be part of the app. The second line ties express to a variable named app. - Now that you have express, put it to work on the next line by entering
app.listen(3000, () => console.log("server started"));
Once the server is running, a visit to localhost://3000 with your browser will send a message of "server started" to your terminal. - So, save server.js and visit your terminal. Enter npm run devStart to start the server.

Browse to http://localhost:3000/ and take a look at your terminal. Hopefully, the words server started appear there. - For our next trick, I am going to vary just a little from the video lesson. On the line after const app = express(), add this one:
app.get('/', (req, res) => { res.send('this is a test');});
Now visit http://localhost:3000/ again and refresh your browser. This time the message "this is a test" should appear in your browser window.
The logic is that whenever you visit a URL you send a get request to that URL.
That is the req part in (req, res).
res stands for response, so res.send('this is a test') basically means send the following message. -
In the next step, (3 minutes into video - 5 minutes) the video leads you through the mongoose database set up process. All of the code that he asks you to input is shown in bold below so you can save time by copying and pasting. The fourth line, useUnifiedTopology: true, is not asked for in the video, but seems to have become a requirement since the video was produced.
const mongoose = require("mongoose");mongoose.connect('mongodb://localhost/subscribers', {useNewUrlParser: true,useUnifiedTopology: true});const db = mongoose.connection;db.on('error', (error) => console.error(error));db.once('open', () => console.error('Connected to the database')); - In the next step (minutes 5 - 6 ) Kyle shows how to place the database connection information inside of the .env file to protect it, and put it back into the server.js file with a variable.
The .env file should contain this line, which specifies the database URL: DATABASE_URL=mongodb://localhost/subscribers .
The hard coded connection in server.js should be replaced with this: mongoose.connect(process.env.DATABASE_URL.
Finally, doting needs to be required at the top of server.js with this line: require('dotenv').config()
Create Routes and Set Up Server for JSON
(5.50 minutes to 10 minutes)
- At this point, the video leads you through the process (very short) of setting up your server to accept json, and then sets up what is known as a route. This part is a tiny bit confusing because two things are happening and he goes over it so quickly that is is not clear which is which!
- The first thing that happens is that he is setting up routes in a separate folder and file. Putting everything into one giant file (ie. server.js) would be a bad practice for the same reason that using one drawer for all of your clothing is a bad idea. Storing different parts of the project in separate folders and files makes your project easier to manage by breaking it into smaller pieces.
- He also leads you through the part of setting up actual routes, so that all of the database activity takes place at http://localhost:3000/subscribers . In other words, /subscribers is your route to the database. So, moving forward....
- Activate json with this line: app.use(express.json());
- Create a variable that brings content from a file named subscribers.js that will be inside of a folder named routes, by entering:
const subscribersRouter = require('./routes/subscribers'); - Now create the folder named routes and create the new file named subscribers.js inside of the routes folder.
- Instruct express to use the new route by entering
app.use('/subscribers', subscribersRouter) into server.js. - /subscribers refers to the URL of localhost://3000/subscribers.
A user who visits this URL is 'routed' via the subscribersRouter path toward the code inside of the subscribers.js file. - Note as well that Kyle used the term 'middleware.' Other lessons that I have gone through, elaborate a lot about middleware but I'm still a little fuzzy on the concept! In this case, the subscribers.js file targeted by the variable subscribersRouter is middleware. Best I can tell, any file that is targeted via a route is considered to be middleware. But be prepared, if you end up spending very much time on this stuff, you will hear about middleware again. And again, and again, and.....
- At 7:30 you begin to set up the subscribers.js file. This part may require some explanation if you are new to node, express, and routes. You will set up 4 different methods in subscribers.js that are activated by the type of 'visit.' If someone browses the URL, the get method is activated; Posting to the URL activates the post method, patch updates a subscriber, and delete, deletes one. Here is a link to to the code that you are asked to enter up to the 10 minute mark.
Testing Routes with the Rest Client Extension and creating a Subscriber Model
(10 minutes to 14.30 minutes)
This portion of the lesson begins with adding "hello world" text to the get route as in: router.get('/', (req, res) => {res.send('Hello World')})
Afterward, you learn how to install and use VSCode's Rest Client Extension that you will use to test your routes.
- Install the Rest Client Extension and activate it
- Create a route.rest file at the root level of your site (ie. in the same folder as server.js)
- Add GET http://localhost:3000/subscribers to the route.rest file as instructed, and test your get route.
- Create the models folder and a new file named subscriber.js within the models folder.
- Build the subscriber model as instructed. If you have problems with it, here is a link to a 'helper file.'
Build out the subscribers.js File
(14.30 minutes to
- Per instructions, bring the subscriber model into subscribers.js (the one in the routes folder) by requiring it with this statement:
const Subscriber = require('../models/subscriber') - Modify the first router.get statement to get ALL of the subscribers. Here is a link to the code that Kyle outlines in the video, but pay careful attention to what he says about the code because the concepts are important. In particular, he uses async in conjunction with await, which basically tells the server not to do anything until it receives data from the server, or if things go badly, an error message instead.
- Test things with route.rest.
- Set up router.post in order to add new subscribers to your database. Don't be intimidated by this step! All you are doing is using the subscriber.js model that you set up earlier to save data into the database.
- The first portion of the function gets the data and assigns it to appropriate variables.
- The next part saves it to the database.
- The third part generates and error if the user sends data that is missing something or is incorrectly formatted.
- At 18.30 he shows how to set things up in subscribers.js to post data. Click here to see my take on the task.
- At 20:20 the lesson returns to subscribers.js and focuses on developing middleware for routes that need to display, delete, or modify a specific subscriber, via a function named getSubscriber. Once again, here's the link.
- Next he puts the getSubscriber function to work as middleware on the "Getting One" route near line 16. He modifies the route so that it will send the name of a subscriber. Here is the code for the modified route if you want it.
- At 24:00 he demonstrates how to get just one subscriber with a get request and id from route.rest.
- For the remainder of the lesson, Kyle demonstrates how to set up and use subscribers.js and route.rest to delete or modify a given subscriber. Here is a link to a fully complete version of subscribers.js and yet another link to a completed route.rest.