Surprise. You probably expected classwork on the last two or three lessons from vuemastery but I decided to focus on something much more relevant: Dawgs! Specifically, we are going to explore the process of capturing and displaying information from The Dog Api, a site that lists and shares pictures of zillions of dog breeds. Why dogs when there is also an excellent cat API? Well, as you would expect, the dog api is much less complicated and more friendly than the Cat api and therefore more suitable for this lesson. Nothing against the cat api; it's comprehensive and very informative. Just a bit more complicated for an introductory lesson.
Step 1: Check out the API
 To begin, take a look at the following URL: https://dog.ceo/api/breed/spaniel/list . When you visit the URL you should see an object containing a list of spaniels just like this one:
- Now visit https://dog.ceo/api/breed/spaniel/images where you will see an object with the same structure that contains a long list of spaniel image urls. The dog api contains MANY more dogs and images, ranging from Airedales to Whippets but let's focus on Spaniels to keep the pack size manageable.
Step 2: Check out this example
- To get started download dawgs.zip and move both files into your work folder. Open both and take a look.
- If you look closely at the html file, you will see that, in addition to vue, it calls a file named axios.js (on line 3). Axios is yet another javascript library that is designed to work with Vue (and React) to get data from APIs. Further down you will also see this line: <div id="app" v-on:load="showme"> where we are using v-on:load to call a function named showme.
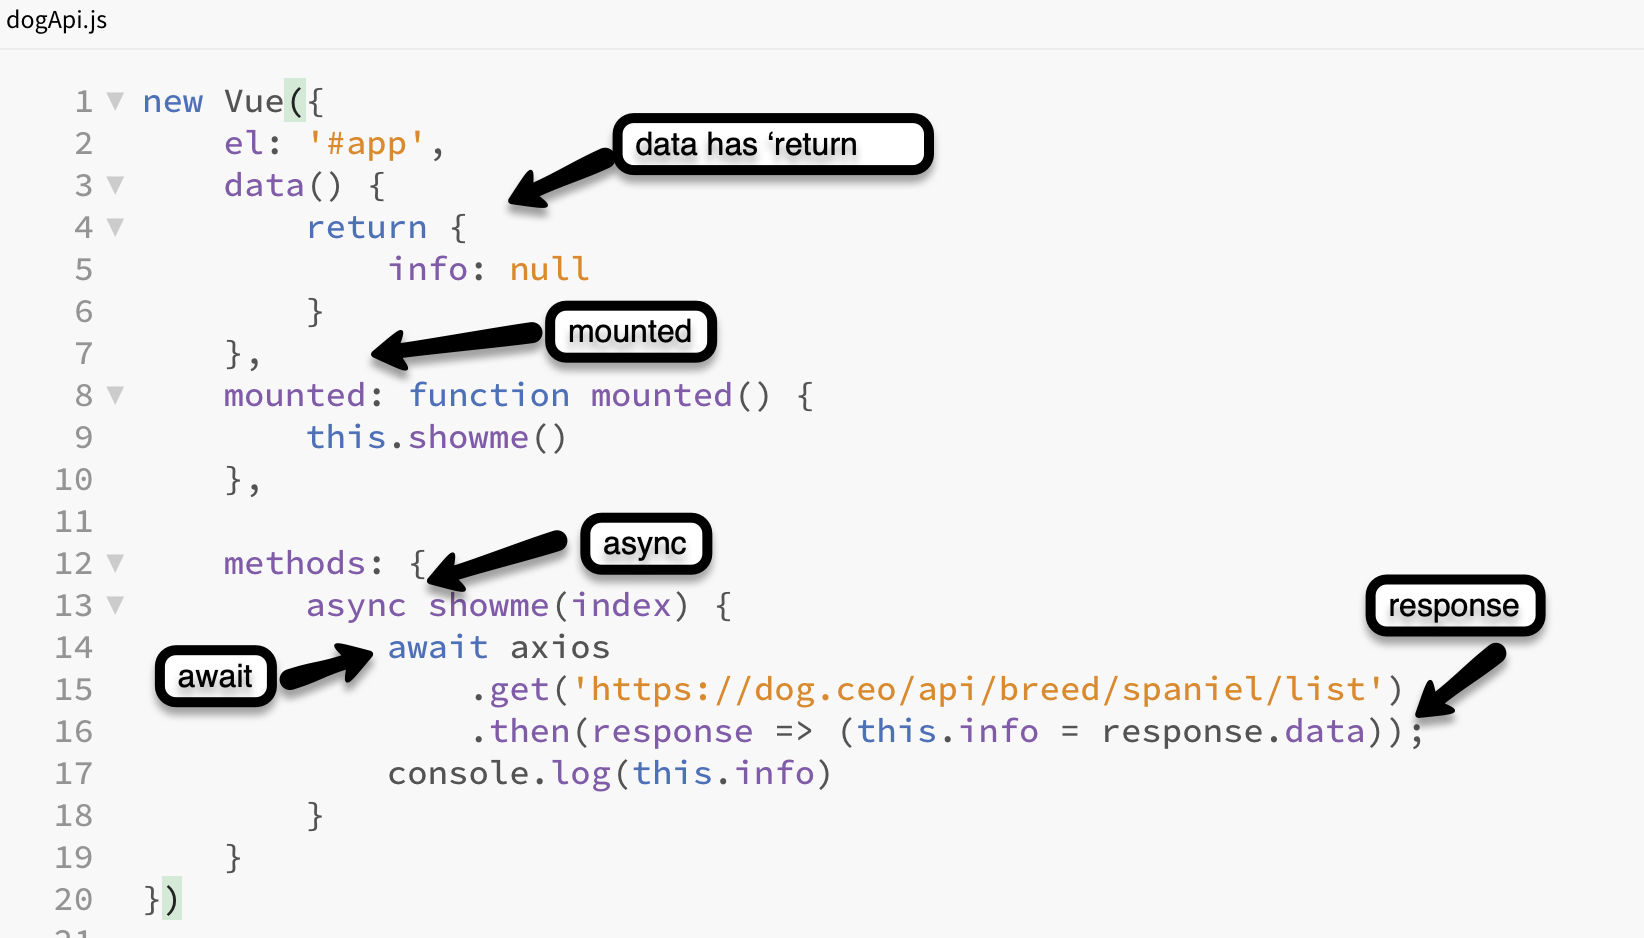
- Now take a look at the js file which contains, among other things, the showme function. As you can see, things are quite different in this particular Vue instance.
- For one thing, we didn't bother to create a variable tied to the new Vue. Turns out, that is not always necessary.
- Also, note that the data has return inside. I'm not completely clear on the reasons, but axios can't do it's job unless you return the variables inside of data.
- Notice also that there is a 'mounted' section which calls the showme function. Based on my reading, mounted works a lot like document.ready in jquery, in that it waits until everything is loaded to execute actions and functions. But without mounted, no data.
- A bit further, you will notice that async is a qualifier for the showme function. One of things that cost me a lot of time when I first figured out how to load APIs with Vue, is that the data from the API must be loaded before you can do anything with it. If you try to something with data that is not yet loaded, things break!
Async in conjunction with await, basically says, "hey don't do anything UNTIL all of the data is loaded."
One other thing that is a bit odd about the showme function is that it will not work without an argument. The reason that is odd is that, in many cases, there is no actual need to use the argument when you call the function. - Finally, you will note the .get command which literally gets the url of the api and the next line which sets the variable 'info' (this.info) to the response data from the api.
Step 3: Get some data from the API
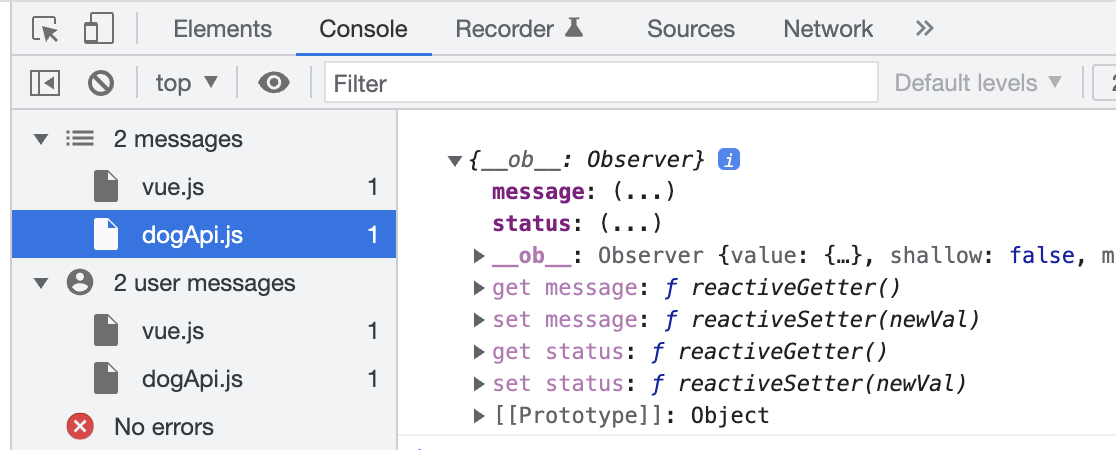
- The last line of showme logs this.info to the console. Run your app and take a look at the output. At this point, all you should see is an 'object' which is fairly unintelligible.
- To see an array of spaniels, change console.log(this.info) to console.log(this.info.message) and try again.

- Try again with console.log(this.info.message[0]) and the first spaniel in the array, blenheim, should appear.
- To see an array of spaniels, change console.log(this.info) to console.log(this.info.message) and try again.
- So our first task is to get those names from the Spaniel array and display them on our web page. To accomplish that task, create a new empty array variable named moreData and add it to your data list underneath info: null, as moreData: [] .

- On the last line of the showme function, set the value of this.moreData to this.info.message as shown below.

- Time to put moreData to work. Use v-for as shown below to output each of those breeds into an <h3> tag. While you are at it, add the word 'spaniel' to the right of {{theBreed}} so you will see the full name!

- Now that we have names, how about images? I once had a good friend named Jimmer who was part cocker spaniel, so let's start with a long list of cocker spaniel images at: https://dog.ceo/api/breed/spaniel/cocker/images
- As you can see, getting the URL of the image list for a given breed of Spaniel is pretty straightforward: https://dog.ceo/api/breed/spaniel/cocker/images brings in Cocker Spaniel images, https://dog.ceo/api/breed/spaniel/brittany/images produces a list of Brittany Spaniel images, etc.
- Make those image URLs show up on your page by changing
.get('https://dog.ceo/api/breed/spaniel/list') to
.get('https://dog.ceo/api/breed/spaniel/cocker/images')
in the showme function. - At this point, it's child's play to use image binding to get all of those images to appear on your page.Simply delete <h3>{{theBreed}}</h3> and replace it with
<img :src="theBreed"> All of those cocker images should now appear. -
Change .get('https://dog.ceo/api/breed/spaniel/cocker/images') to .get('https://dog.ceo/api/breed/spaniel/brittany/images') and see what happens.
- For fun, let's create a link to each of those pictures. Use the screen capture below as your guide.

- It's time to take things one step further by by tying all of the spaniel breeds to a series of buttons.
- Step one is to put the argument in the showme function to work as shown below:

- Step two is to remove the on load statement from the app div tag and add a series of buttons that call the showme function with arguments for each spaniel breed (blenheim, brittany, cocker, irish, japanese, sussex, and welsh ) included. Leave the <div v-for="theBreed in moreData"> part btw.

- Step one is to put the argument in the showme function to work as shown below:
- Now that we know how to generate a list of dog images, let's move on to something maybe even more satisfying. Slideshows!
SlideShows
To begin, save your html file as slideshow.html, your js file as slideshow.js and connect the two. This way you don't have to overwrite your previous work.
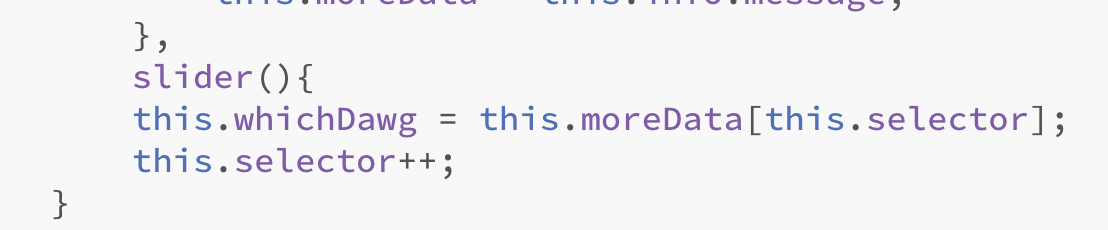
 Add whichDawg and selector to your data as shown at right.
- Add a new method named slider right after the showme method as shown below.
- Now call the slider method the from the showme method as shown below.

- Add the modifications shown below to your html file. At this point you should have a slideshow! But it only moves in one direction. Plus you have to click one of the showme buttons to get it started.

- To make an image set load as soon as the page appears, modify the mounted function to call one of the breeds. I chose cocker of course.

- The inevitable challenge(s)
- Modify the slider function so that your slideshows can move in either direction. You can do this with arguments (challenging) or simply by adding another function (easy, but unsatisfying).
- Make sure that the selector variable never becomes too large or too small (less than 0 or greater than the length of an array) to load an image when it is clicked.