In this lesson we are going to use the Node.js ecosystem to create, feed and edit a json feed. With no further ado, let's get started.
Set the Stage
In the following steps you will install Node and some supportive systems referred to as 'dependencies' that add special powers to your Node project.
-
- Check to see if you have node. Open terminal, enter node -v and press return. If you don't get information about your version of Node, you need to Follow this link to install Node.
- Visual Studio will be our editor. If you don't already have VS, follow this link to install it.
- Create a folder for your project named node1 inside of your 5110 folder, or wherever you do your work for this class.
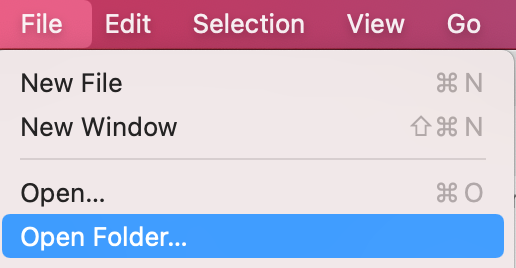
- Open VSCode and select "Open Folder". Navigate to the node1 folder and open it.
- Create a new file and save it as server.js. It should automatically save to the node1 folder.
 VSCode includes a terminal that you will use extensively with this tutorial. If you are new to using a terminal, you can think of it as an old technology that gives you super powers once you learn how to use it. To access those superpowers, with VSCode open, select View Terminal to make it appear. The terminal window should now be visible underneath the VSCode editor near the bottom of your screen.
Initialize your project
- Enter NPM init from the terminal window. Do NOT add the dollar sign from the screen capture below!

-
Press return and respond to all of the prompts by simply hitting the enter key until you are done. In case you are wondering, NPM stands for Node Package Manager. Although Node is stand alone application that can do many things by itself, the package manager gives you access to add-on programs, known as dependencies, that vastly expands node's capabilities.
- As a result of the NPM init process, you now have a new file named package
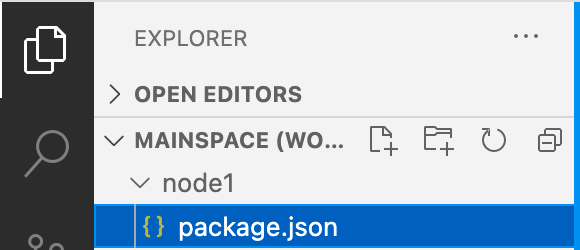 .json that provides information to your project, including which dependencies (external scripts) to use.
 - Now it is time to install your 'dependencies. ' As stated earlier, dependencies essentially are add-on programs that work in conjunction with node.js to add functionality beyond what Node itself is capable of.
- the first, and arguably most important, dependency is Express. Express is for creating custom URLs that can run scripts and load webpages. The webpages and scripts, in turn, empower you to do things such as database integration. To install the dependencies for this tutorial type or paste
- npm i express into your terminal and press enter.
- Next, install dotenv and nodemon simultaneously by entering
npm i --save-dev dotenv nodemon .
dotenv is used for saving variables that you don't want other people to be able to access.
Nodemon restarts the app every time you make a change. Otherwise, you have to manually restart the app to see the effect of each change that you make, and that can take up a LOT of time. This is especially useful when there is an error in your code because you get immediate (negative) feedback and have to fix each error before you can progress further.
- Now that you have installed a bunch of dependencies, take a look at your files via VSCode. You should see a new node_modules folder that contains all of those new dependencies that you just installed.
- Open package.json and figure out where the dependencies are referenced. As you can see, during the installation process package.json automatically updated as well.
- the first, and arguably most important, dependency is Express. Express is for creating custom URLs that can run scripts and load webpages. The webpages and scripts, in turn, empower you to do things such as database integration. To install the dependencies for this tutorial type or paste
- While you are in package.json take a look at the scripts that are referenced on or near line 6.

Hopefully you see a line that states "start": "node server.js" which indicates that server.js is the starting point for the project. Change it to
"start": "nodemon server.js" . (yes, you need all of those double quotes)
You are doing this so that Nodemon, one of the dependencies that you just installed is used to start the script instead of plain old Node. Once Nodemon is on the job, every time you make a change and save a file, the server will automatically restart so that you can get immediate feedback. If the project restarts successfully, all is well. If the project doesn't restart, your recent changes have created an error that needs to be addressed.
Build it
- Paste the following code segment into server.js. The first two lines tell your app to use express and set it to a variable named app. The third line sets the port of your app to localhost:3000, while the remaining lines set things up for your app to be able to read and send data.
var express = require("express"); var app = express(); var port = 3000; app.use(express.urlencoded({ extended: true })); app.use(express.json()) - Add the next code segment which tells your app to pay attention to localhost:3000 and use it as a starting point.
app.listen(port, () => {
console.log("Server listening on port " + port);
});
Save server.js. Now revisit your terminal, enter npm start to start the server, and press return. Visit localhost:3000 with your browser and see if the terminal sent you a message.
- Make text appear in the browser at localhost:3000
Once again, enter the code below into server.js and save it. Afterward, refresh your browser at localhost:3000 and you should see your message in the browser window. Just for fun (and edification), add some additional text to your message, along with an html tag or two, such as "<h1>Hello.</h1>app.get("/", (req, res) => { res.send("Hello. This URL, localhost:3000 is your starting point. "); });Just for fun (and edification), add some additional text to your message, along with an html tag or two, such as "<h1>Hello.</h1>
- Make text appear in the browser at a specified URL
The code below instructs the browser to display text at localhost:3000/name. Add it to server.js and visit localhost:3000/name to try it out.app.get("/name", (req, res) => { res.send("<h1>this is an example of mapping a new url</h2> "); }); - Load an html file at a specified URL
Create a new html file named about.html, enter some information about SOMETHING as well as an image, and save it into the same folder as server.js.- Add the code segment below to server.js. The purpose of this step is to instruct the app to automatically load about.html whenever someone visits localhost:3000/about.
app.get("/about", (req, res) => {
res.sendFile(__dirname + "/about.html");
});
Visit localhost:3000/about and about.html should appear, but oops, the image does not appear! That's because things are a little different in NodeWorld and you need to jump through a couple of small hoops to add images as well as separate js and css files. Here's how.
- Add this line to server.js: app.use(express.static(‘public’)); which tells node to look for static files, such as images, js, and css files, in a folder named public.
- Create a folder named public and drag your image into it.Try again and the image should appear.
- BTW, if about.html were stored inside of a folder named files, the instructions would change to: res.sendFile(__dirname + "/files/about.html");
As you should be able to tell, you could easily use this feature to generate custom URLs for an entire website. Create one more html file and repeat the previous step to set up another custom URL. Test it.
- Add the code segment below to server.js. The purpose of this step is to instruct the app to automatically load about.html whenever someone visits localhost:3000/about.
Next Step: Database Integration with MongoDB
Follow this link to learn how to interact with an online database with node.