Until this point, we haven't worried too much about the appearance of our work in this course, but it's worth noting that Javascript (and now Vue) works just as well in a nicely designed web page as it does in in a bare bones page. In this lesson we are going to explore how to use some vue.js tools that we have recently been introduced to, to populate a Webpage based on a template.. Any template would have worked, but I chose Prologue from html5up.net because it was simple and easy to navigate.
- To begin, download prologue, unzip it and drag the new folder into wherever you are doing your work for this course. I recommend that you rename the folder something simple such as vueOne.
- Take a look inside the folder. You should see an index.html file, an images folder, and an assets folder with four additional folders inside.
- Open index.html with your editor and go into split view. Add this line of code just under the <head> tag
<script src="https://cdn.jsdelivr.net/npm/vue/dist/vue.js"></script>
to connect to the vue library. - Create a new file on the empty side of the split view, and save it into the js folder in the assets folder as newVue.js
- Near the bottom of the index.html file, around line 200, you should see an area where several js files are connected. Connect newVue.js there as well. It's not too important where you connect it, but it's nice to keep things tidy.
- Now take a look just below the body tag of index.html and you will see that the document starts with a header (<div id="header">) that contains a logo, all of the navigation, as well as some social icons. We are going to rework all of the content in header so that it comes from the newVue.js file that we just linked.
- In newVue add the new Vue object shown below. As you can see, we have tied the element (el) to our #header id.
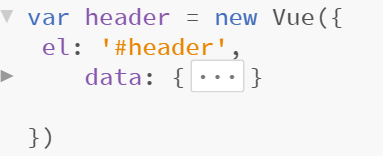
- Now add information to your data. Use the screen
capture as a guide, but add your own information (obviously).
- Replace the words Jane Doe in the title id (<h1 id="title">Jane Doe</h1>) with yourName in double brackets as shown below, and do the same for "Hyperspace Engineer" as well.

- Now visit your links and replace the words Intro, Portfolio, About, and Contact with the appropriate element (as always in double brackets) from the data of your new Vue object (the one named header).
- Test things out. Is everything working properly. If so, your next job is to get a picture of yourself and replace the logo (avatar.jpg) image with a picture of yourself. Or a puppy. Your call.
- First add the image to your data ( avatar: "images/me.jpg" ) or something of the sort.
- Now add that element to your html by replacing <img src="images/avatar.jpg" with <img :src="avatar" which should have the effect of putting your new image in place of the old image.
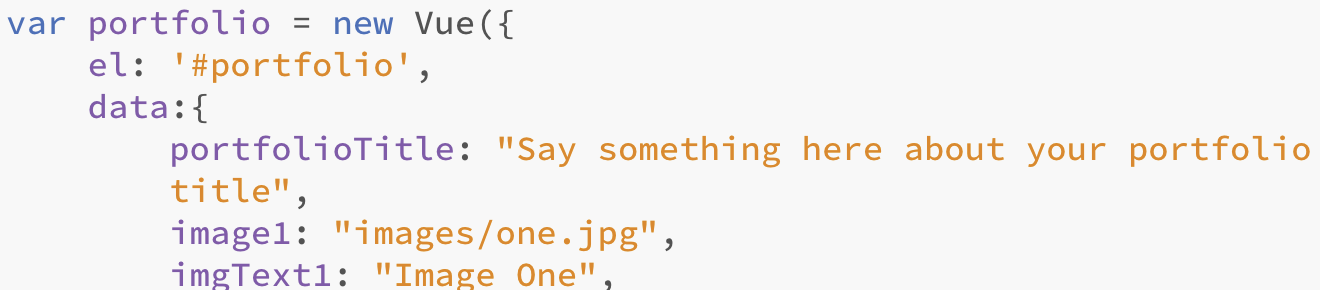
- Now we are going to skip past the introduction section and work on the portfolio section. Create a new Vue as shown below. Your job is to swap the current portfolio title to one that comes from your vue object and to change out all of the photo blobs with actual photos and new captions that come from Vue. You are welcome to scour the internet for open source photos, or you can download and use these photos of various parts of Spain from our server.

- Your job now is to finish up the last three sections: Intro, about, and contact. For simplicity's sake, follow the same strategy of creating a new Vue for each one.
Build a list
The fourth vuemastery.com lesson addressed list rendering, so these next steps will hopefully serve as a refresher.
- Add a new section to your document between the about and contact sections.

- Add a link to the new section and use (why not?) the fa-list icon as shown below.

- Add a line to the data section of the header vue
(remember var header = new Vue ?) that will add text to the link. - Create yet another new Vue named list ( new Vue = list ) and tie it to #list.
- Now create an array of your favorite restaurants or something of the sort in the data section of your new Vue. Something like
 Take note btw, that the apostrophe in Mama's boy had to be commented out in order to avoid major Javascript/Vue confusion.
 - Now use the v-for looping technique to display all of those values. BTW, use <ul> if you prefer a bulleted list.
 if you list appears like mine, it most likely is very stretched out. See if you can fix that problem with a new css rule. #list ol {width: worked well for me .
Fill in the blank with feedback
One of your vuemastery homework lessons introduced v-if, the basic Vue conditional statement. In this exercise we are going to use v-if, along with input v-model (which you probably haven't seen yet) to create a basic fill in the blank exercise, that provides feedback based on text entry.
- Create a new section with the id of conditional and generate a link to it. You just did this in a previous section.
- Create a new Vue named conditional and connect it to #conditional.
- Add a data section with the element of teacherName. Set the value of teacherName to "" ( teacherName: "" )
- Now add two p tags to your html document with the v-if statements shown below embedded into them. As you may remember from the vuemastery exercise, the idea is for only one of these to be visible based on the terms of the v-if statement. The first v-if statement should be obvious, but the second one is more tricky because it contains two conditions . The first one teacherName !='Emuel" , would automatically cause "Not yet, keep trying" to appear before the user enters anything. The second condition, && teacherName != "", keeps anything from happening until the user enters data, because it matches the initial value of teacherName.

- Add the text and <input v-model element below, just above those p tags. Now when your user starts entering text, the content in the second p tag should become visible until the correct answer is entered. At that point, the content in the first p tag should appear instead.

- BTW, it's worth knowing that whatever value is initially assigned to teacherName will appear in the text box. Once everything is working properly, change the initial value of teacherName in the data section of the conditional Vue to actual text just to see the effect.
- Just to make sure that you fully understand how these methods work, create at least one additional question and answer scenario before you move on to the next step.
- Now that we know how fill in the blank works, let's take a stab at multiple choice. First, comment out <input v-model="teacherName">.
-
Now add the line below which instigates Vue's v-on:click method and sets the value of teacherName to John.

- Click it. As you should see, the same two p tags we used for feedback with fill in the blank, can perform the same function for this multiple choice exercise.
- Add 3 more p tags with v-on:click tied to three additional NMI instructors. Make sure one of them is correct and test it out.
Change the color of a div with Event Handling
Much of what we will cover in this lesson is drawn from vuemastery lessons that you were not yet assigned. You just learned about v-on:click in the previous exercise. v-on also works with mouseover and all of the other standard Javascript event handlers. The new parts are
-
- 'Methods' as part of a Vue object. Methods allow you to create and use functions in the vue context.
- Also new: we will use our function to change the css characteristics (background color) of a div tag.
Let's get started.
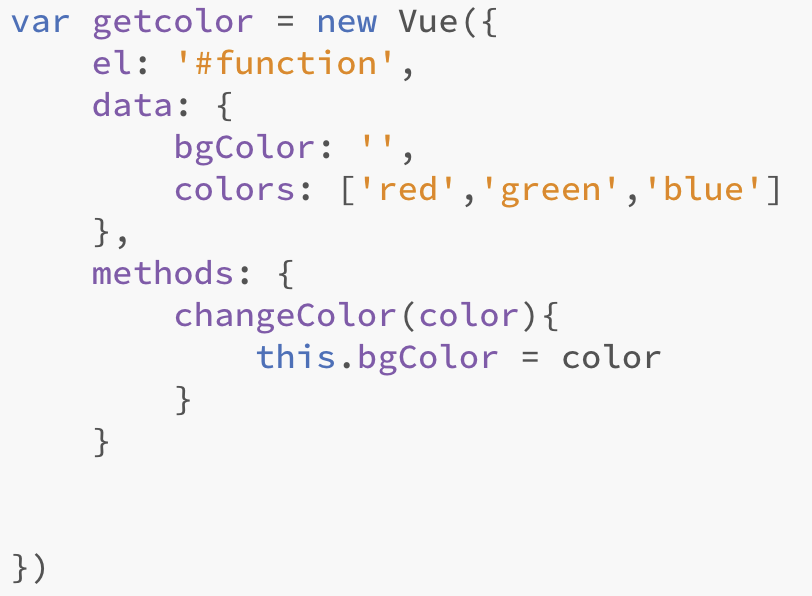
- Create yet another new section with and id of '#function' and a corresponding newVue named getColor which you will tie to "#function" (you know now :).
- Link it!
- Oh what the heck, it's getting late. Here is the whole vue! As you can see, our data contains an empty variable named bgColor and an array of colors. Below that is the methods section. The function inside of methods does just one thing: it sets the value of bgColor to the argument color. Remember this part because we are about to put it to work in our html document.
- Add a new div tag, give it an id or a class, and set the following values in your css: width: 300px; height:300px; float:left;
- Set the background color of the same div tag to the bgColor variable as shown below

- Add the code shown below below the div that you just created.

-
The v-for part causes the p tag to repeat three times as it iterates over the colors array, and to output red, green, and blue successively as text.
@mouseover calls the changeColor function and adds in color as the argument (the same color value, red, green, or blue that is set by {{color }}) . -
The changeColor function, in turn, sets bgColor to color: red, green, or blue which, in turn, sets the background color of your div tag.
-
- Did it work? If so, great. Now your last task, should you have enough time, is to create another set of three p tags that change the width of your div.
- Did you finish that one too?? OK, it probably looked pretty sloppy right? An even better way would be to accomplish both color and width change in just one function. This will require two arguments and I'm not even sure how to go about it yet, but you obviously need a challenge. Or use the remaining class time for working on something else.