Get your Mongo on
Now that you know some node basics, it's time to learn a bit about how node interacts with a database. Our goal is to create a fully functional, albeit modest, CRUD enabled app. (For the uninitiated, CRUD stands for CREATE READ UPDATE DELETE). In this lesson we will focus on a json-based Database named mongodb that is a very popular choice among node developers.
To save time we will use a pre-existing package.json file to initialize the project and install all of our dependencies at once.
- Create a new folder named mongo.
- Open the new mongo folder with VScode, as in: File - Open Folder.
- Instead of installing dependencies one by one, this time we will start with a pre-made package.json file so that you can install all of them at once.
- Create a new file named package.json and paste the code below into it.
{ "name": "mongo-demo", "version": "1.0.0", "description": "how to getdata into mongo", "main": "server.js", "scripts": { "start": "nodemon server.js" }, "keywords": [ "node", "emuel", "mongodb", "mongoose", "demo" ], "author": "random person from internet", "license": "ISC", "dependencies": { "body-parser": "^1.19.0", "dotenv": "^10.0.0", "express": "^4.17.1", "mongodb": "^4.2.1", "mongoose": "^6.0.13", "nodemon": "^2.0.15" } } - Save package.json and take a look at it what we are about to install. On line 7, under scripts, we set things up so that the command npm start will execute a file named server.js with nodemon.
- Now take a look at the dependencies section on line 18. In addition to express and nodemon, we are also installing three new extensions, mongodb, mongoose, and body-parser that enable your app to receive, process, and post data. dotenv is for storing login information securely.
- Open your terminal, enter npm install and press return. The installation process should begin and run for several seconds. When it ends you should see a new folder named node_modules that contains the extensions that you just installed.
- Create a new file named package.json and paste the code below into it.
- Create a new file named server.js that will become the starting point for this app.
- Study the code segment below which you are about to put into server.js. The first two lines set up express. You already know about port and app.listen from the previous exercise. The next two expressions that begin with app.use provide the structure for processing json data, and tell your app to use the mongoose database system. The last four lines set things up for connecting to a mongoose database.
The url variable (var url = "") will hold a connection string, which you will get from MongoDB after you set up an account and create a database.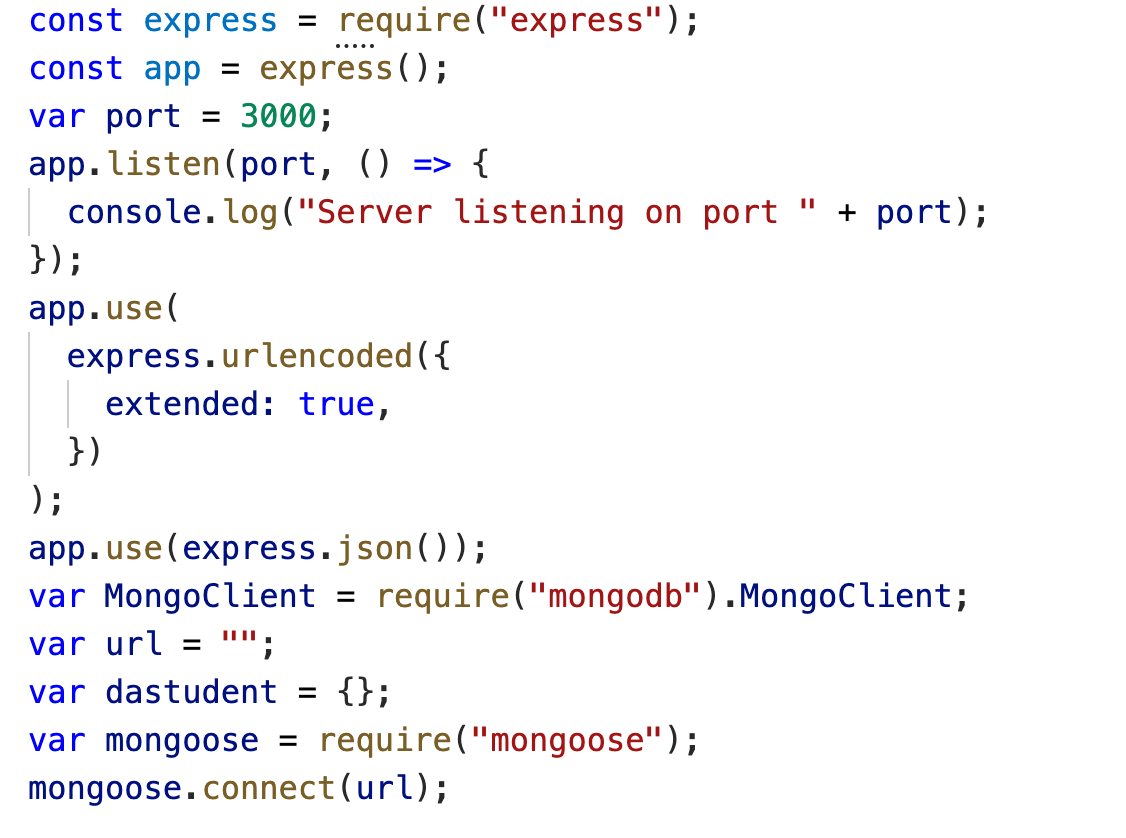
- Copy the code! Click this link to access the code segment (shown above). Copy the code and paste it into server.js.
- Set up your MongoDB account by following this link. Below are some tips for setting your account up properly:
- Verify your email address
- Fill out the small form and choose javascript as your preferred language
- Choose a free account (of course)
- Create your cluster (don't overthink this one)
- Create a user name and password
- Copy and save your password or suffer! I mean it, you will need that password soon. Store it somewhere.
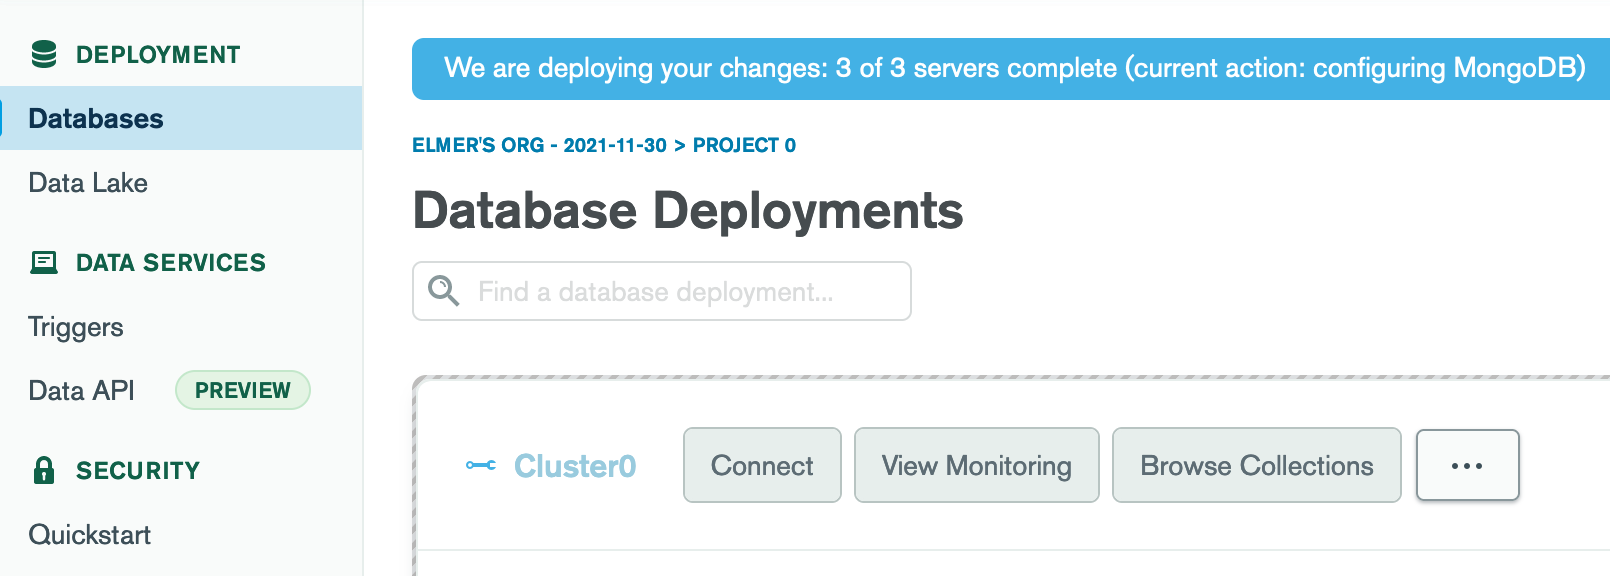
- Click Databases
- Click Connect
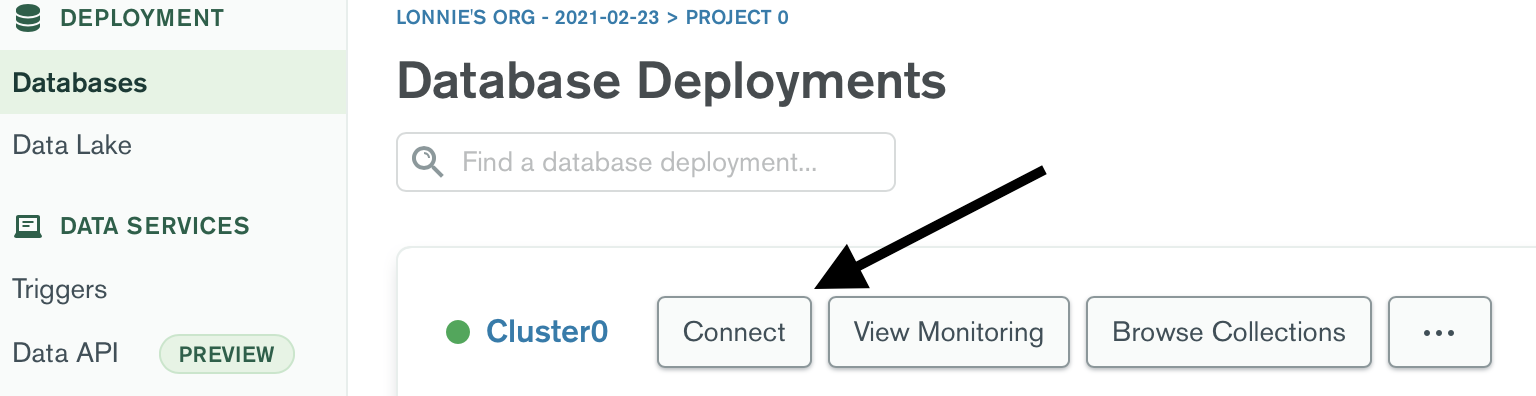
- As you go through the connection process select Connect from anywhere and use the automatically generated IP address.
- For your connection method choose Connect your application.
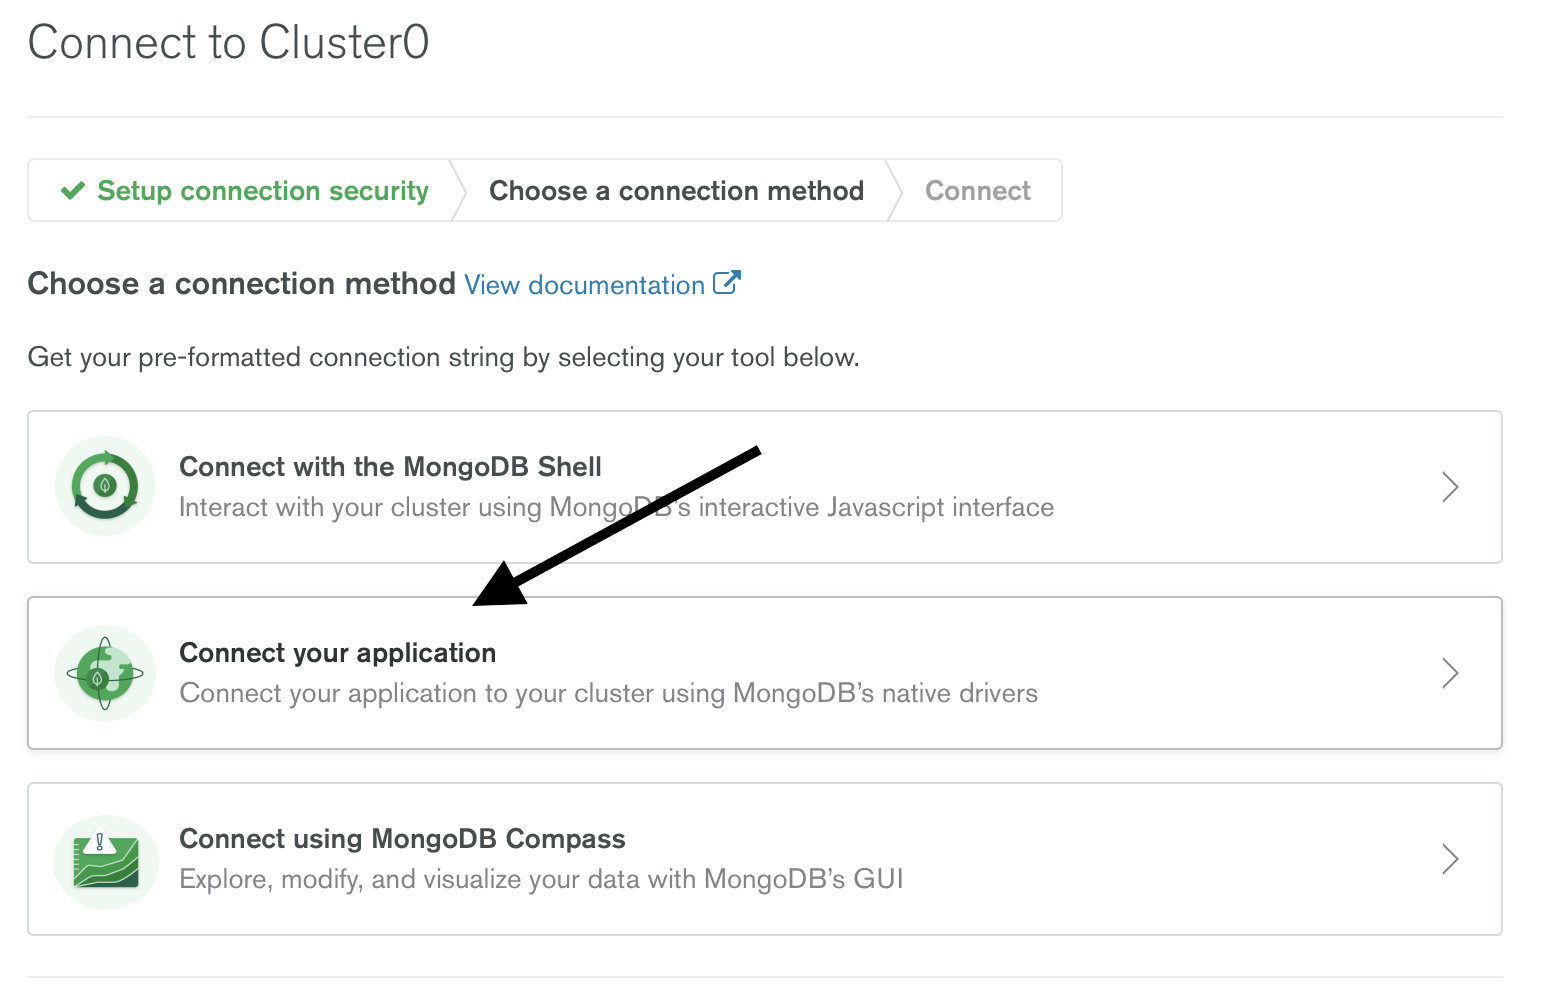
- Copy the string under 2 and replace the part that says <password> with the password that you created and (hopefully) saved in a previous step.
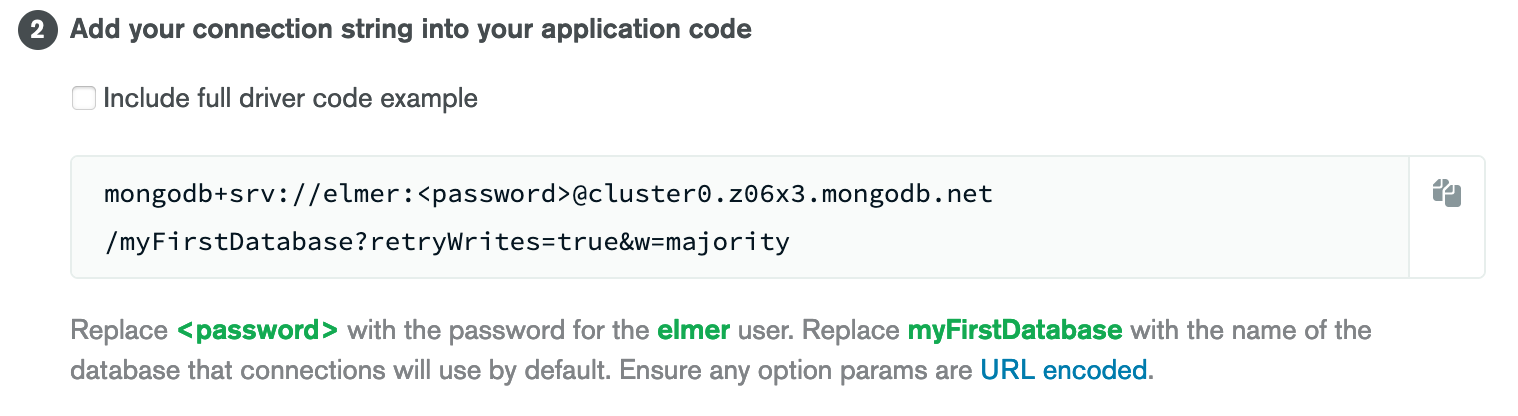
- In server.js paste the connection string between the quotes after var url = "" as shown below

- On the next line create a new variable that will be used to hold data. Name it theUser as in: var theUser = {};
- Create the nameSchema shown below. In this case the nameSchema sets things up for adding two new variables to the database: firstName and lastName.

-
Now create a new variable named User to use that nameSchema as in:
var User = mongoose.model("User", nameSchema);
CRUD: Create
-
- Next, create a new html file named adduser.html and paste the form shown (a few steps) below between the <body> tags.
-
- Notice that the form action points to /addname. We will set things up for using the /addname url in a bit.
- Also note that the two text fields in the form have names that match the nameschema that you created in a previous step.
- Save adduser.html and return to server.js.
 <form method="post" action="/addname">
<label>Enter Your Name</label><br />
<input
type="text"
name="firstName"
placeholder="Enter first name..."
required
/>
<input
type="text"
name="lastName"
placeholder="Enter last name..."
required
/>
<input type="submit" value="Add Name" />
</form>
- Paste the code block below into server. As you should be able to tell by now, visiting localhost:3000/add will load your adduser.html file.
app.get("/add", (req, res) => { res.sendFile(__dirname + "/adduser.html"); }); -
- When the form inside of adduser.html is submitted to the /addname URL, the code segment below is activated to process the data and add it to your database. Paste the code segment into server.js and save it.
app.post("/addname", (req, res) => { var myData = new User(req.body); myData .save() .then((item) => { res.send("Name saved to databases"); }) .catch((err) => { res.status(400).send("Unable to save to database"); }); }); - Open VSCode's terminal and start your app by entering npm start and pressing return. If you don't get an error message, visit localhost:3000/add. Add at least two new users to your database.
- Next, create a new html file named adduser.html and paste the form shown (a few steps) below between the <body> tags.
CRUD: Read
-
-
- Time for another code segment. As you can see, this one activates from the /dadata URL. add it to server.js and save it. Now visit localhost:3000/dadata. If it works properly, you should see a json feed of your user data. Notice that, in addition to the firstName and lastName values that you submitted, each data entry also has a REALLY long id value. In the next two steps we will put those unique id values to work in order to delete and modify database entries.
app.get("/dadata", async (req, res) => {
  try {
    const user = await User.find();
    res.json(user);
  } catch (err) {
    res.status(100).json({
      message: err.message,
    });
  }
});
- Time for another code segment. As you can see, this one activates from the /dadata URL. add it to server.js and save it. Now visit localhost:3000/dadata. If it works properly, you should see a json feed of your user data. Notice that, in addition to the firstName and lastName values that you submitted, each data entry also has a REALLY long id value. In the next two steps we will put those unique id values to work in order to delete and modify database entries.
-
CRUD:Update
In order to update our date we are going to create an html file that pulls data from the /dadata URL into a series of forms. Each database entry has a unique form that is populated with its data. At this point, the data in any given form field can be edited. When you click the submit button for a given form and data set, the modified data is sent to the database. Let's do it!
Get the html file. Click here to access the html file. View and copy the source code; then paste it into a new file named modify.html. Save it.
Take a long hard look at the html and, especially, the js in modify.html. See if you can figure out how it works!
Copy the code block below and paste it into server.js. As you can see, app.get("/modify", loads modify.html, the file that you just created.
app.get("/modify", (req, res) => {
    res.sendFile(__dirname + "/modify.html");
});
Look at the next two code blocks below. The first block, which receives and processes the data that is submitted from modify.html, also relies on the getUser function in the second code block that begins with async function. Both code blocks require the unique id that is created for each new entrant into the database in order to do their job. Paste both blocks into server.js, visit localhost:3000/modify and modify a user. If it works!
app.get("/update/:id", getUser, async (req, res) => {
  if (req.query.firstName != null) {
    res.user.firstName = req.query.firstName;
  } else {
    console.log("don't work");
  }
  if (req.query.lastName != null) {
    res.user.lastName = req.query.lastName;
  }
  try {
    const updatedUser = await res.user.save();
    res.json(updatedUser);
  } catch (err) {
    res.status(400).json({
      message: "not getting data",
    });
  }
  message: "Successfully Updated User";
});


async function getUser(req, res, next) {
    console.log(req.body);
    let user;
    try {
        user = await User.findById(req.params.id);
        console.log(user);
        if (user == null) {
            return res.status(404).json({
                message: "Cannot find user",
            });
        } else {
            message: "found user";
            console.log("success");
        }
    } catch (err) {
        return res.status(500).json({
            message: "Oh Shit! What happened?",
        });
    }
    res.user = user;
    next();
}
CRUD: Delete
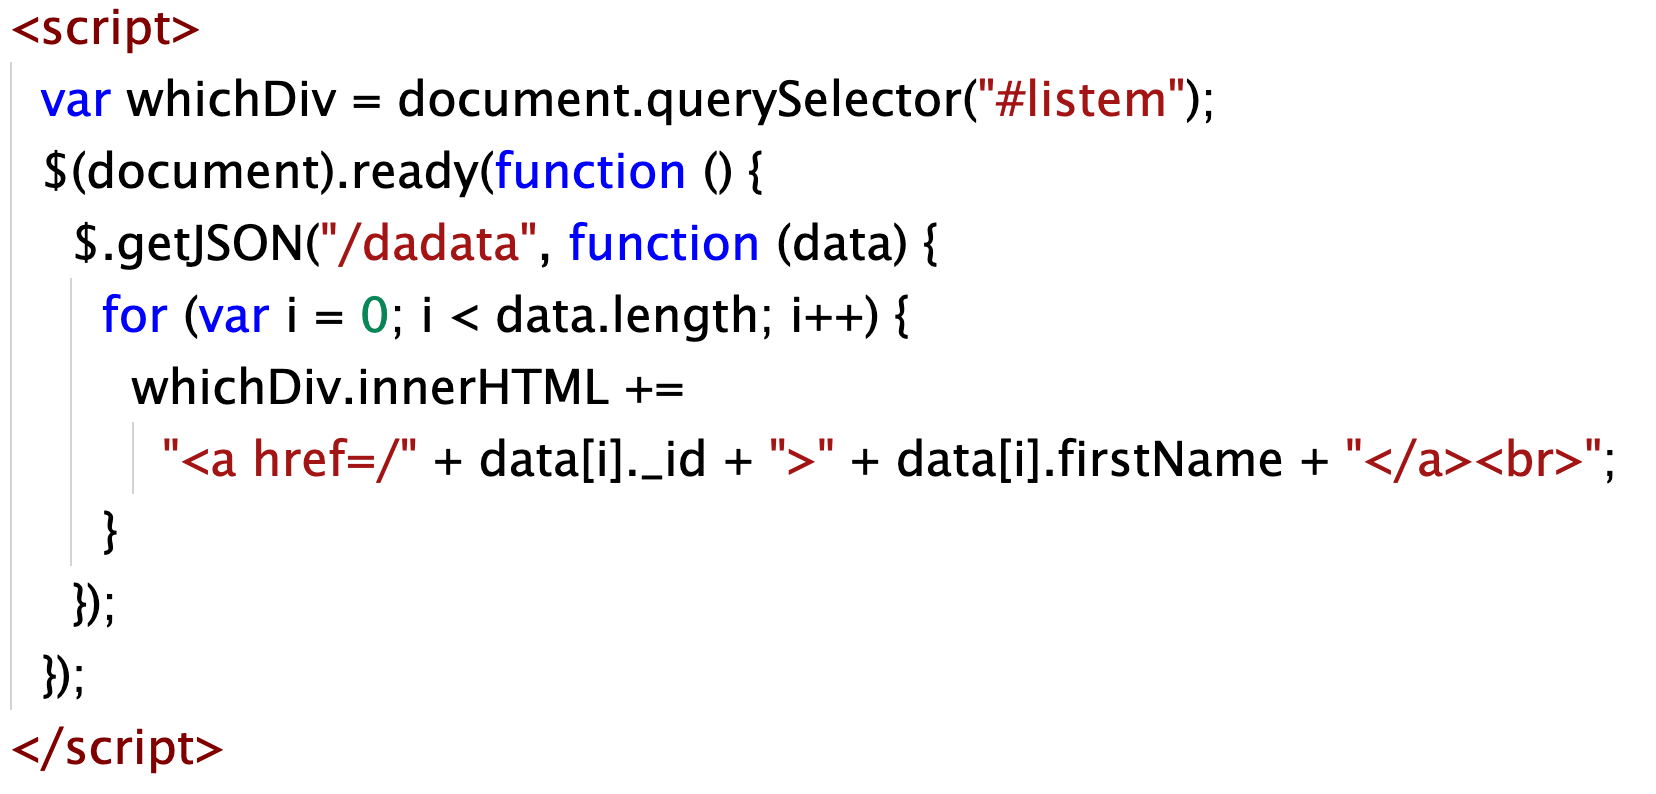
The next step is to create an html file that will allow you to delete your users at will. Luckily, one is already created for you at this link! As you did with modify.html, view and select the source code, create a new file named delete.html, and save it. Now take a short look at the js code from delete.html shown below. As you can see, it grabs the data from the /dadata URL and uses it to create a series of links. Each link displays the firstName value of a given user and, when clicked, visits the root level of your site, in this case localhost:3000, and appends the unique id of the user to the url.
The code block below 'gets' the id from the URL and removes the user from the database. Paste the code block into server.js.
<pre>app.get("/:id", getUser, async (req, res) => {
console.log(req.body);
try {
await res.user.remove();
res.json({
message: "deleted user",
});
} catch (err) {
res.status(500)({
message: err.message,
});
}
});
</pre>
In order to load delete.html you will need the code block below (and this is the last one!). Paste it into server.js, save it, and visit localhost:3000/delete. Delete a user if can!!
app.get("/delete", (req, res) => {
res.sendFile(__dirname + "/delete.html");
});
Create a menu!
Now that you are done, your final task is to create a basic menu at the root level. Something basic like the one below is fine for this exercise. You will also need to figure out how to load the html file that you create. You got this!

Deploy your app?
This one is optional but if you want to share your app with the world, you can do so for free on Heroku. This tutorial explains how, and Heroku has information on their website as well.
One thing to keep in mind is that your app is not as secure as it needs to be. I may explain later on how to hide passwords etc. but I'm not yet to that point in this tutorial.