In the previous lesson you learned how to capture latitude and longitude and submit information from a form to a PHP file. Now we are going to learn how to send the same information to a database and retrieve it afterward. The first step is to create a database to store the information.
Create the Database
- Browse to YOUR website and append cpanel as shown below. Be sure and use https instead of http in order to maximize security and to avoid annoying warnings from your browser.
https://emuel.com/cpanel
- Press return and click your way past any warnings that appear until you arrive at the cpanel login screen.
- Login with your the same username and password that you use for sftp with Cyberduck.

- Find your way to the Database portion of the cpanel and click on the MySQL Database Wizard.
 Create a new database based on your username (the name you login to cpanel with) and append _db to the name as in emuel_db. If, for some reason, you already have a database with that name, name it something else.
- Click the Next Step button and create a username. For simplicity, simply append _user to the username as in emuel_user. Next create a password for the database. To protect your site from being hacked, I encourage you to create a STRONG password.
- Click Next Step, endow your new user with "all privileges", and click Next Step again.

- Click the Home button to return to Cpanel. We will do more work in Cpanel soon, but first let's test our database connection. To do so, download connection.zip from connection.zip, unzip it and open connection.php with Brackets.
- On line one, change you_user to the user name that you just created and replace yourPassword with your actual password
- On the fourth line replace you_db with the name of your brand new database.

- Now take a look at the statements in this file.
- The first statement uses your username and password to establish a connection to the mysql server that holds your database(s) and ties the connection to a variable named, what else, $connection.
- The next statement that starts with if (! connection) checks to see if the connection was successful and alerts you if it was not.
- The next statement, starting with $db_select chooses a specific database.
- The if statement lets you know if there was a failure to select the database. You can think of those two if statements as useful 'tattletales'.
- Upload connection.php into the data folder and visit it with your browser to see if it works. For example, if your website url was lianneharris.com, you would browse to lianneharris.com/data/connection.php. If the page loads blank (aka zero content, aka white screen) and you don't get an error message, it works! Congratulations, time to move to the next step. If you do have an error, double check your username, password, and database name, to make sure that everything is correct. Re-upload connection.php and test it again.
Create a table to hold the data
- Scroll back down to the Database portion of the Cpanel and click the phpMyAdmin button. A new window should pop open which, on its left side, lists your databases, as shown to the right. Click on the database that you just created and look over to the right side of the page.

That's where tables and data are displayed once you have some; which you don't at this point. Time to make a table.
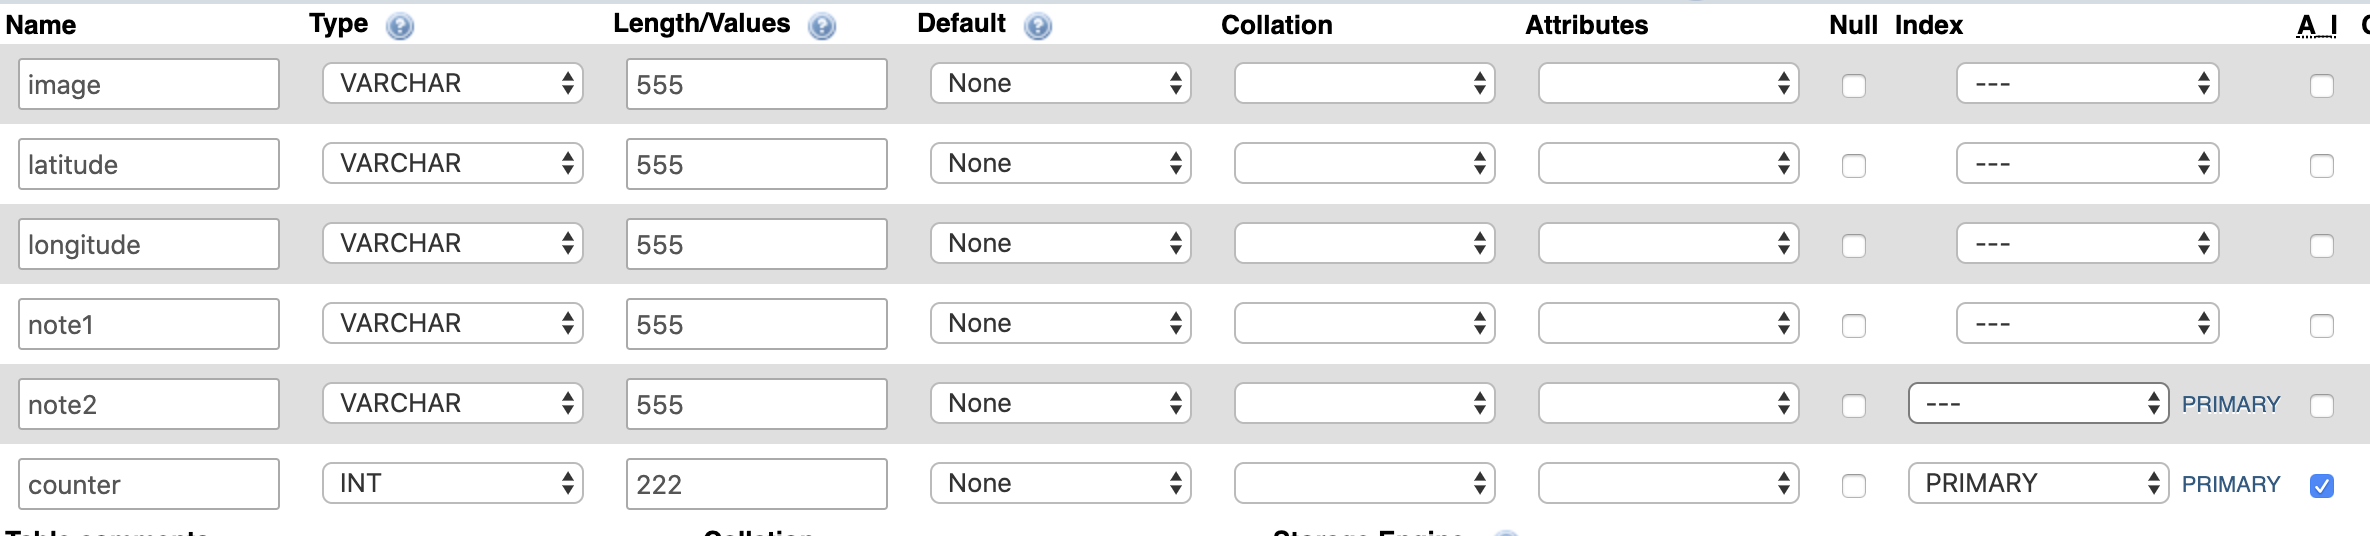
- Name your table foto, add 6 columns and click the go button. Fill out the fields so that your table matches the screen capture below. For the last field named counter, be sure and click the AI (auto increment button) and set it as Primary when prompted. The purpose of that column is, no surprise, to keep a count of your entries. More importantly, phpmyadmin works better when you have Primary column.
When you click the primary checkbox, the screen below will pop up. Click Go and move one.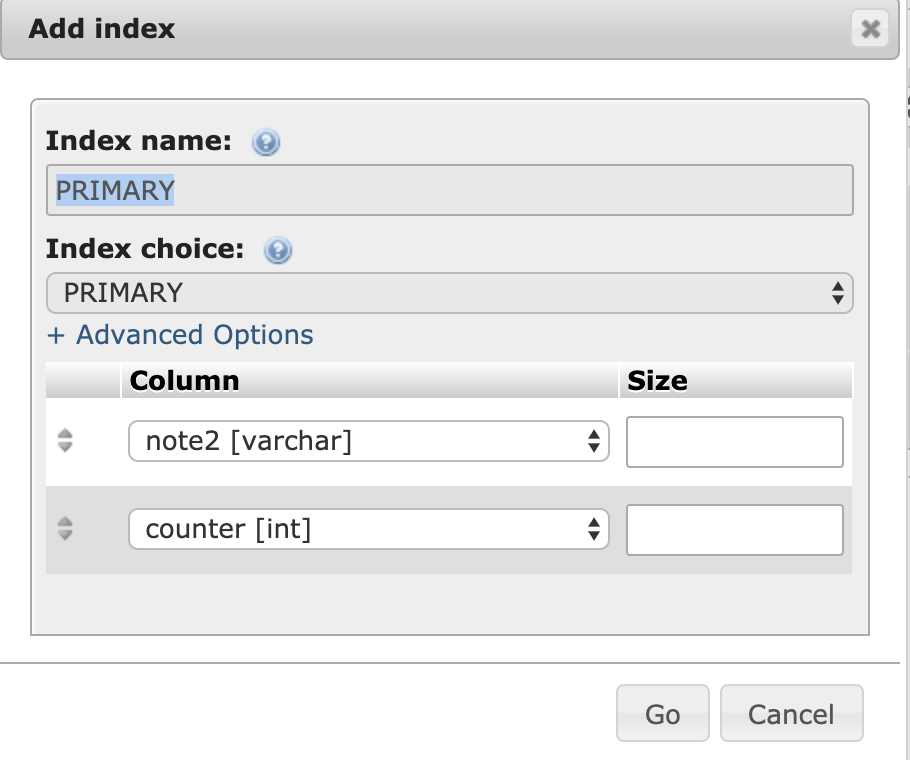
Time for data insertion
We are about to edit upload.php but first lets address one of the more tedious things about PHP: it's a real pain to have to constantly re-upload a php file every time you need to test it! The solution to this problem is to edit the php file directly from the server. Here is how it works.
-
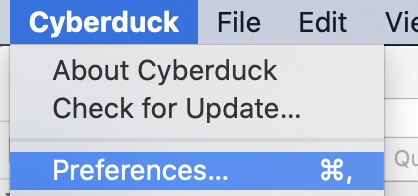
 Open Cyberduck and click the preferences option shown here.
- Click the Editor tab and choose Brackets as your editor. Chances are you will have to browse to the Applications folder in order to choose Brackets.
- Click "Always Use this Application" and close preferences.
- Use Cyberduck to locate upload.php on your server, click edit and upload.php should appear in Brackets. Now when you save upload.php, any edits that you make will automatically be saved to the server!
- At the very end of the PHP portion of upload.php, just before the ?> that ends it, add require_once("connection.php"); With this step, all of the code in connection.php becomes part of upload.php and connects you to your new database.
- On the next line, paste in:
$addOne = "INSERT INTO foto (image, latitude, longitude, note1, note2)
VALUES('$file_name', '$latitude', '$longitude', '$note1','$note2')";
With this step you are inserting the values that were sent from the form into the corresponding fields of your database.
- Now add the statements below that let you know if data submission actually took place.
if (!mysqli_query($connection, $addOne)) { echo "This didn't work"; die('Error: '.mysqli_error()); } else { echo "<br> Your information was submitted successfully."; } - Visit the URL of your app and submit some data (ie. take at least two pictures and sets of notes, and click the Submit button). Once you have submitted data, use phymyadmin to see if the data is actually there. If so, congratulations. Your reward is more work!
Data Retrieval
Sooooo, your latitude, longitude, notes and the name of your photos are all successfully stored in a database. The next step is getting them out of that database. Here's how to get them all at once.
-
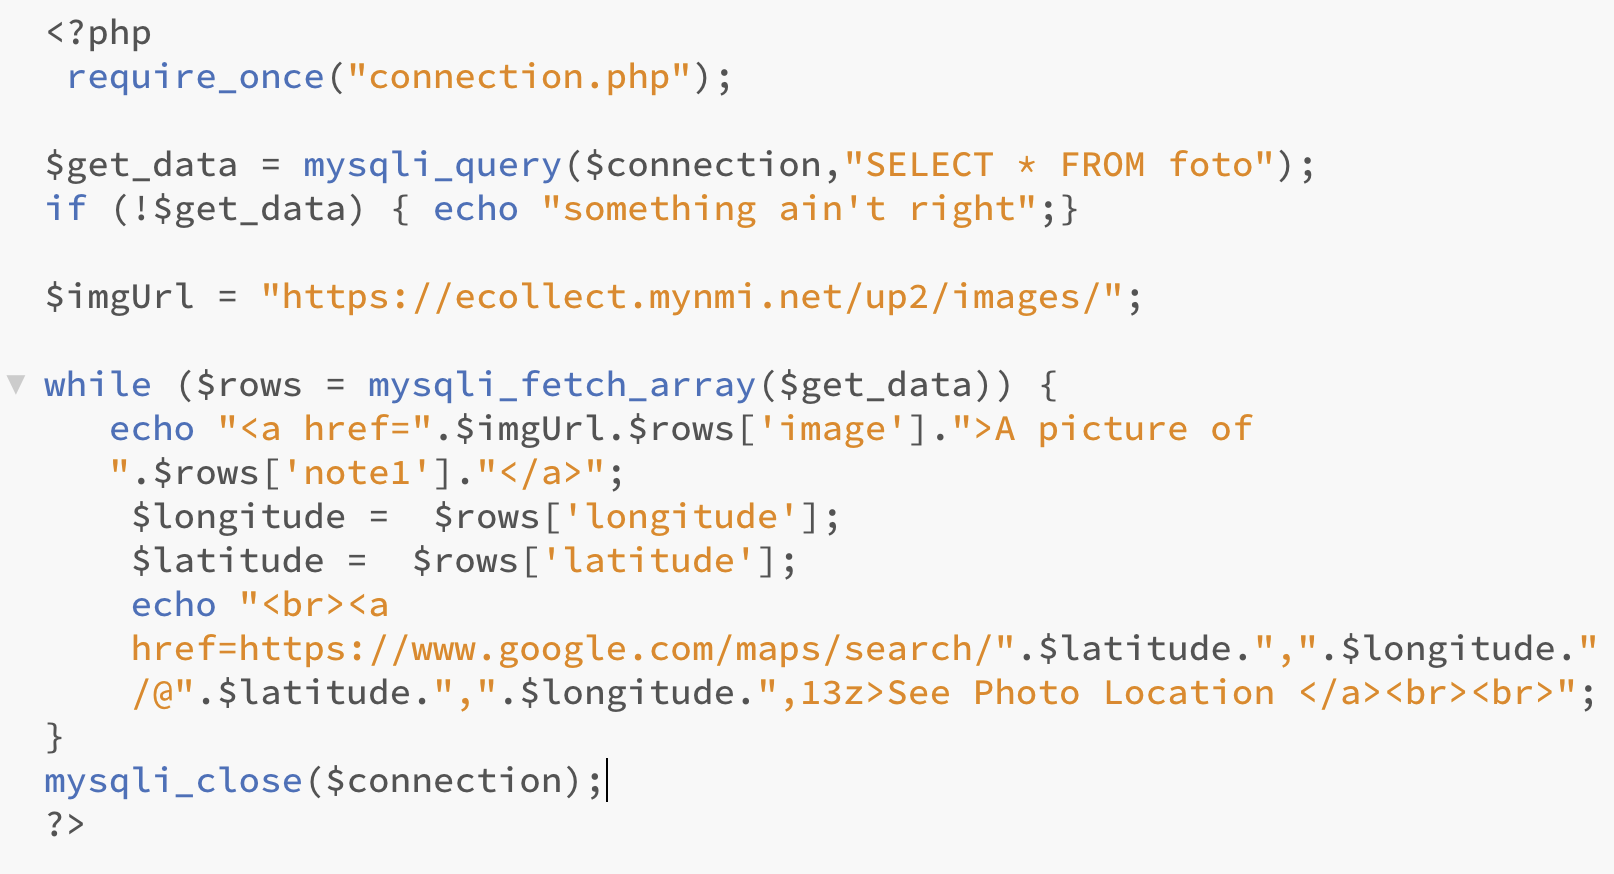
- Create a new file named data.php. On the very first line, start a new php block with <?php . On the next line, import connection.php

- Create a variable, you can name it whatever you want, but I named mine $get_data. Using the screen capture below as a model, set the value of your new variable to a mysqli_query that connects to your database and selects everything from the foto table that contains your data. As you can see, we also included an error message that will appear only if there is a problem (in colloquial English no less 🙂

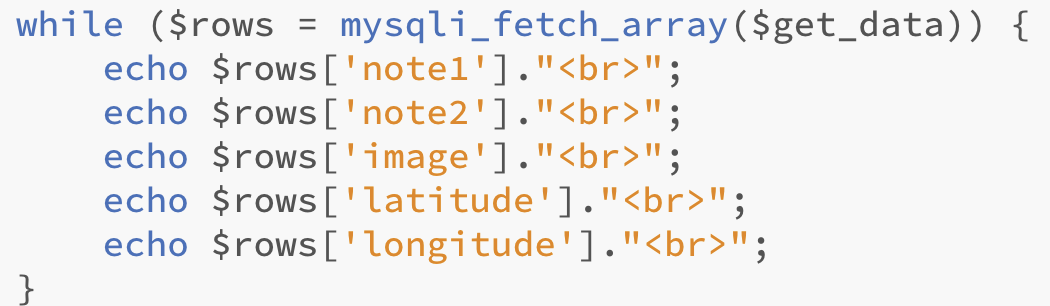
- Now use the while loop depicted below to sequentially pull each item that is stored in your foto table
- Upload data.php and visit it with your browser. Everything in the fotos table should appear. But so what? Kind of boring, right? Let's do something more useful and interesting with that data.
-
 Just to make life easy, open data.php directly from the server by clicking on it with Cyberduck and choosing edit. If it opens in something other than your preferred text editor (in this class that is most likely Brackets or Vscode) visit Cyberduck preferences, set your editor, and try again.
- Delete all of the echo statements in your while loop. When you finish your while loop should match this screen capture.

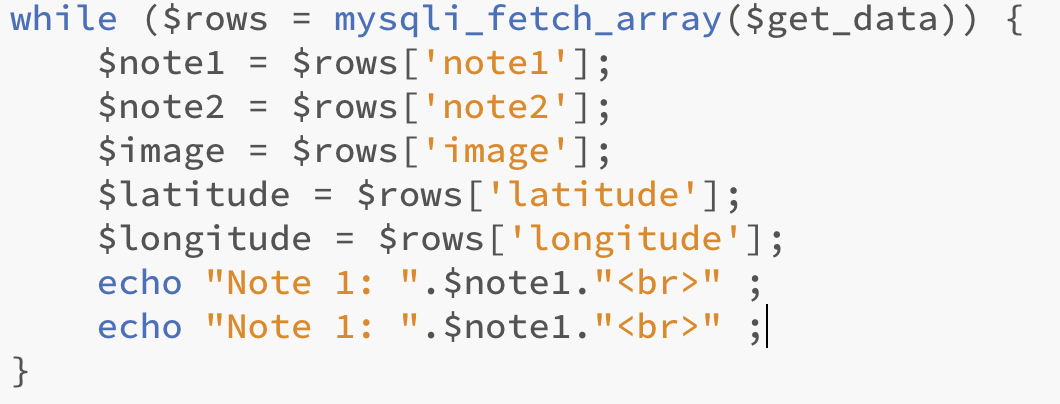
- Set all of data to variables as shown below.

- Delete all of the echo statements in your while loop. When you finish your while loop should match this screen capture.
- Next use those variables and dot syntax (dots in PHP work like + symbols in javascript) to add text that explains the purpose of each note (see below of course :). Save your file and refresh it in your browser to see the output.
- Now let's create a link to each image. To accomplish this objective, you first need to create a variable (before the while loop) that captures the path to the folder that contains your images, which should be something like https://yourdomain/data/images. Let's name that variable $imgurl as in:

- Now use dot syntax to output a link to each image. Give it your best shot without a crutch (seriously). If you get really frustrated, here's a screen capture that shows how.
- And FINALLY, let's create a link using the $latitude and $longitude variables that show where each photo was taken. The code for that one is fairly gnarly, so you can just copy it here!
<a href=https://www.google.com/maps/search/".$latitude.",".$longitude."/@".$latitude.",".$longitude.",13z>See Photo Location </a>
- Test everything. If it doesn't work properly, here's a link to a screen capture of the entire project that may clear things up.
- Create a new file named data.php. On the very first line, start a new php block with <?php . On the next line, import connection.php